 |
|||
|
|
|||
|
Page Title:
HOSE ASSEMBLY #10 2522 INSTALLATION - continued |
|
||
| ||||||||||
|
|
 DRAFT
TB 9-2320-364-13&P-1
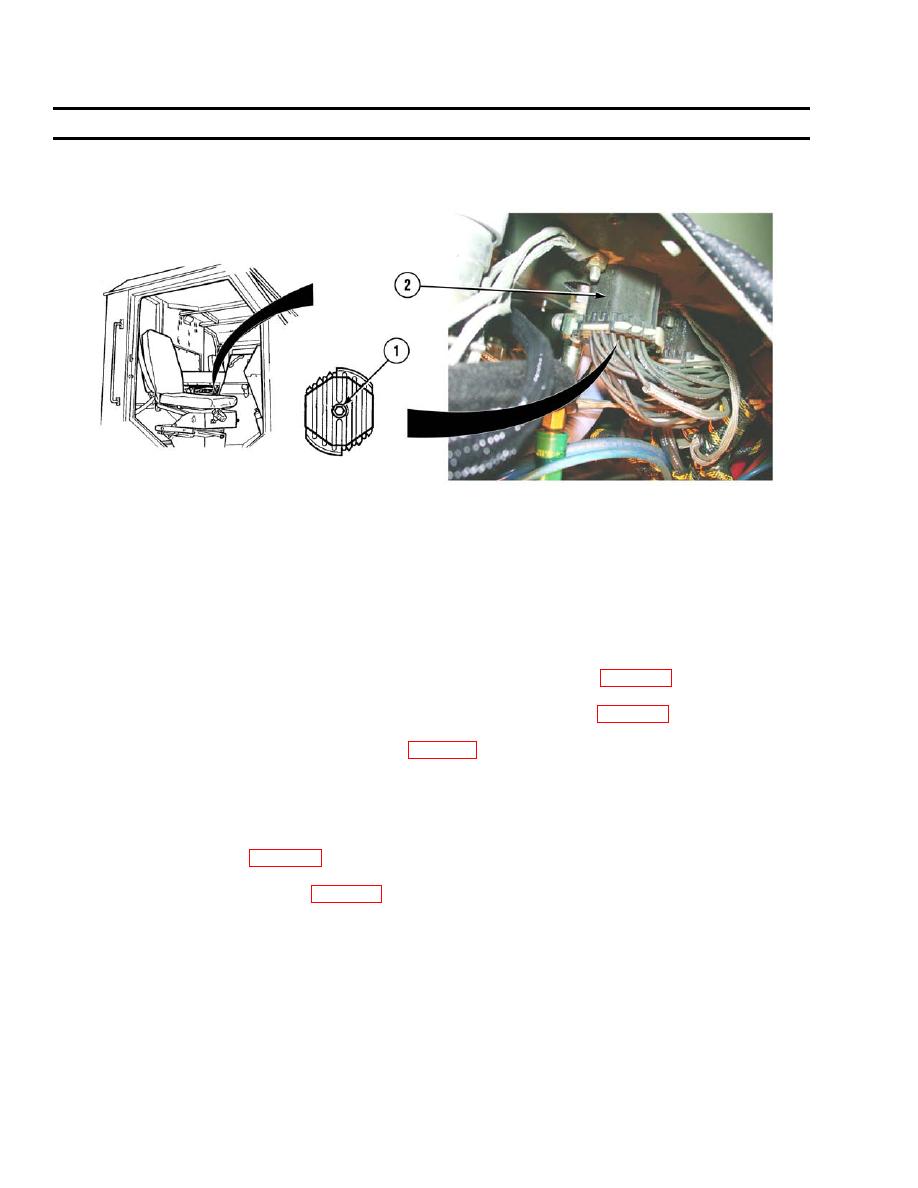
AC HOSES REPLACEMENT - Continued
- - - - - - - - - - - - - - - - - - - - - - - - - - - - - - - - - - - - - -
PLSAC126
NOTE
Install cable ties as needed to secure AC hose away from moving parts.
4. Connect chassis harness MC3 connector (2) and tighten center screw (1).
FOLLOW-ON MAINTENANCE
1. Install AC low pressure switch if hose assembly #10 2522 was replaced (WP 0040).
2. Install AC high pressure switch if hose assembly #8 2521 was replaced (WP 0038).
3. Install left side noise panel and rubber flap (WP 0051).
4. Install right side noise panel (TM 9-2320-364-20).
5. Install electronic control box (ECB) right side panel (TM 9-2320-364-20).
6. Charge AC system (WP 0053).
7. Perform leak test inspection (WP 0052).
END OF WORK PACKAGE
0039-20
|
|
Privacy Statement - Press Release - Copyright Information. - Contact Us |
