 |
|||
|
|
|||
|
|
|||
| ||||||||||
|
|
 TM 5-4110-217-14
precision bearing should require only light taps to
position it. Install the bearing flush with the inside end of
the bore. If the head of a lock pin is damaged, use side
cutters or "Easy-Out" tool to remove pin. Then install a
new lock pin. Apply oil to the thrust washers to hold in
place when the crankshaft is installed. The oil grooves in
the thrust washer bearings must face the crankshaft. Be
sure two notches fit over lock pins.
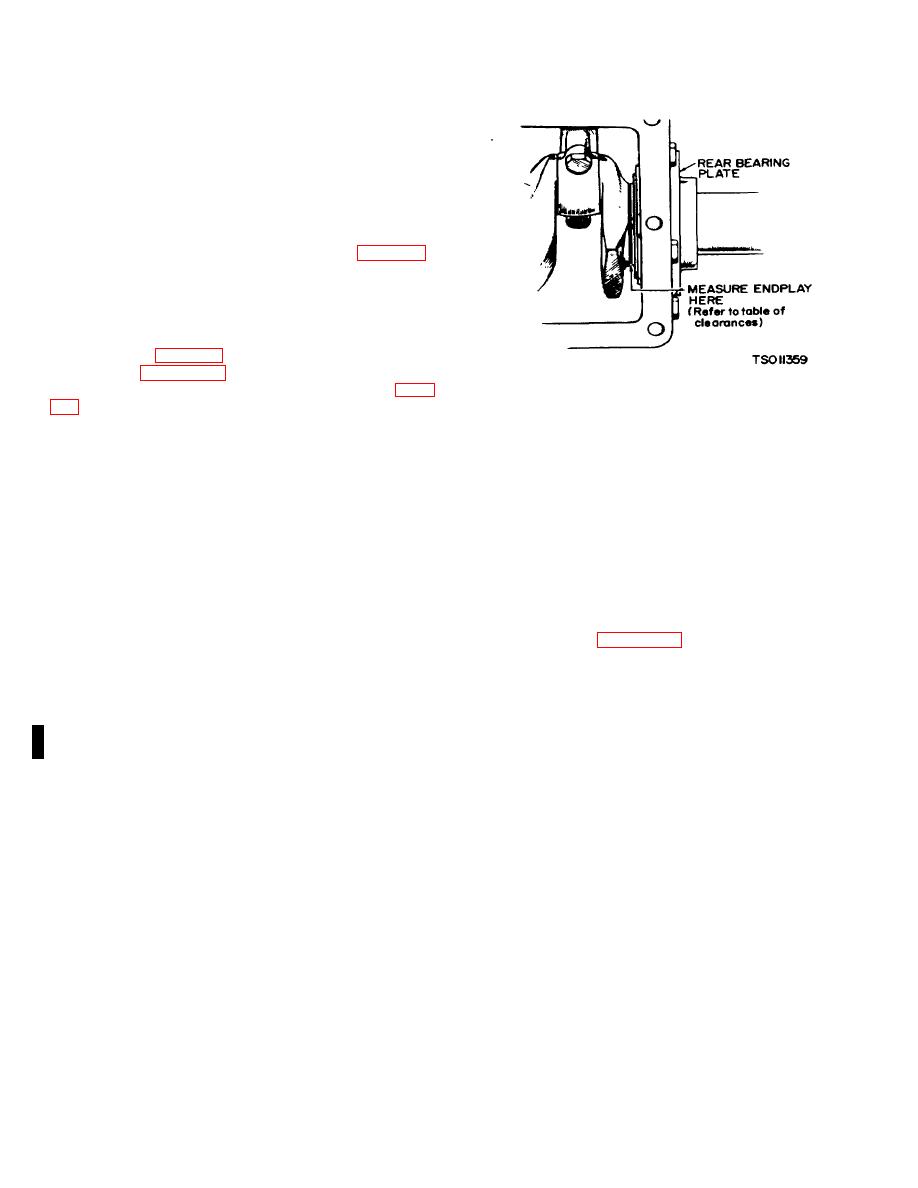
(4) Reinstall crankshaft in engine block to
perform a check of the crankshaft endplay (fig. 5-26).
Reassemble the crankshaft (199) and associated parts,
piston assemblies (206), connecting rod (197), and
bearing plate (117) with gaskets (120) and (121).
(5) After the rear bearing end plate (117) has
been tightened using the torque recommended in
tabulated data (para. 1-5), check the crankshaft endplay
as shown in figure 5-26. If there is too much endplay
(see Dimensions and Clearances in tabulated data, para.
Figure 5-26. Measuring Crankshaft Endplay (Model
RMP-J/1-10G)
rear bearing end plate and replace the gasket with a
thinner gasket from the gasket kit. For too little endplay,
making sure the thrust washer notches line up with the
remove the rear bearing end plate and replace the
lock pins.
Torque and recheck endplay of the
gasket with a thicker one. Reinstall the end plate .
crankshaft.
Section VII. OIL SEALS
fibrous grease or stiff cup grease.
This will improve
5-26. Bearing Plate Oil Seal.
sealing. Refer to figure 5-27.
a. Removal Jig. 3-11).
(1) Remove clutch (114) by loosening
(2) When installing the bearing plate oil seal
setscrew (115).
(116), tap the seal into the bearing plate bore to bottom
(2) Remove crankshaft bearing plate (117) to
against the shoulder in the plate bore. Use a seal
replace its oil seal (116).
expander or place a piece of shim stock around the end
(3) Drive the oil seal out from the inside using
of the crankshaft, when replacing the bearing plate (117)
bearing plate driver tool.
to avoid damaging the seal. Remove the shim stock as
b. Reassembly.
soon as the plate is in place.
(1) Before installing the new bearing plate oil
seal (116), fill the space between the seal with a
.
Change 3 5-16
|
|
Privacy Statement - Press Release - Copyright Information. - Contact Us |
