 |
|||
|
|
|||
|
|
|||
| ||||||||||
|
|
 TM 5-4120-273-15
orator coil and forced into the conditioned air
space by the evaporator fan.
A one-half ton expansion valve controls the rate
of flow of liquid refrigerant into the evaporator
with halide torch for refrigerant leaks.
coil during the cooling cycle of operation (fig.
c. Inspection and Cleaning.
3-11, 3-12). Another one-half ton expansion (fig.
(1) Inspect coil for bent fins, cracks or
3-11, 3-12) valve functions when the unit is in the
breaks. Solder any cracks and straighten bent fins
bypass cycle of operation.
with coil comb or thin nose pliers.
(2) Clean coil with low pressure compressed
3-52. Filter-Drier
air.
The filter-drier prevents the accumulation of
moisture and contaminants within the refrigerant
tubing. The filter-drier must be replaced each time
the system is exposed to the atmosphere.
3-4, is mounted on the bottom rear of the casing,
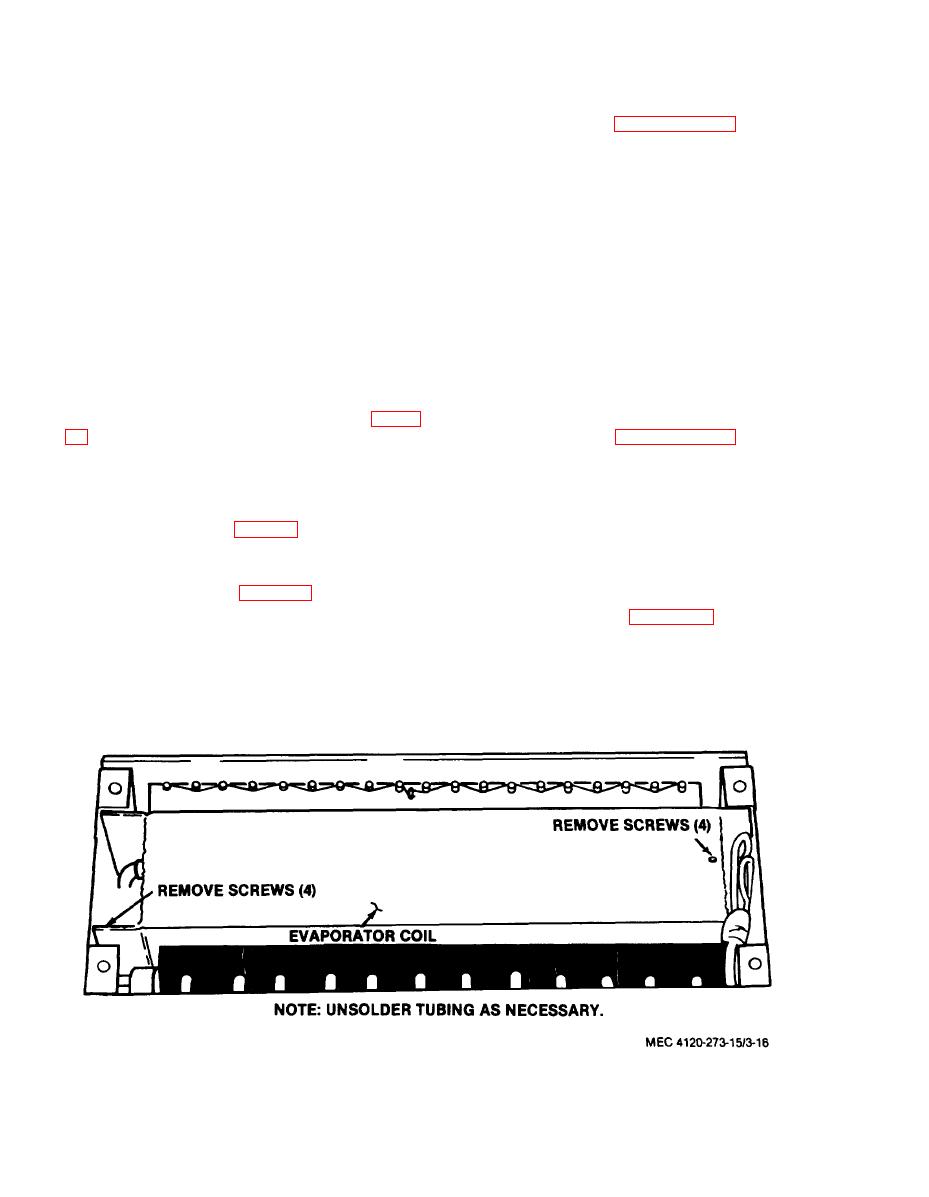
directly beneath the condenser fan. The coil must
be removed from the air conditioner for repair or
a. General. The sight glass indicates the refrig-
replacement. The coil is made from copper tube
erant moisture content. A stortage of refrigerant
and aluminum fin and is of the fin-tube configura-
is indicated by flash gas in the sight glass (fig. 3-
tion.
b. Inspection. Inspect for excessive moisture in
with halide torch for refrigerant leaks.
refrigerant. Excessive moisture is indicated by the
c. Inspection and Cleaning.
changing of the color code from green to yellow.
(1) Inspect coil for bent fins, cracks or
breaks. Solder any cracks. Straighten bent fins
with coil comb or thin nose pliers.
(2) Clean coil with low pressure compressed
Inspect for cracks or broken casing.
air.
3-57. Drain Tubes
the casing directly behind the discharge grille. The
drain tubes.
b. Inspection and Servicing.
coil must be removed from the air conditioner for
(1) Inspect tubes for obstructions and loose
repair or replacement. The mixture of fresh air
and n-circulated air is passed through the evap-
connections.
|
|
Privacy Statement - Press Release - Copyright Information. - Contact Us |
