 |
|||
|
|
|||
|
Page Title:
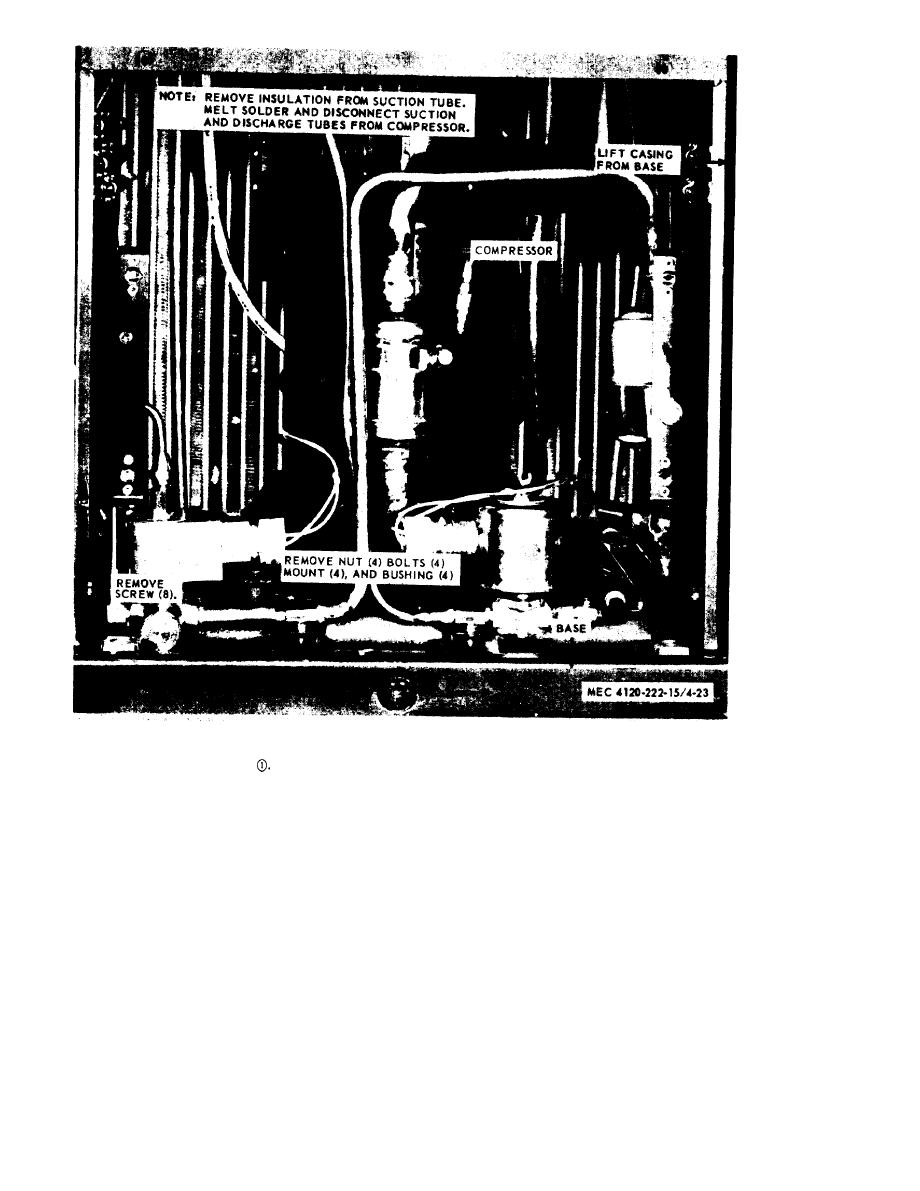
Figure 5-14. Compressor/motor assembly, removal and installation. |
|
||
| ||||||||||
|
|
 Compressor/motor assembly, removal and installation.
proved rubber gloves should be worn to avoid
(2) Discharge a small amount of refrigerant
and smell it. A characteristic burned odor indi-
acid burns.
cates a severe burnout.
d. Determine Severity of Burnout. It is helpful
(3) Inspect the suction line at the compres-
to classify burnouts as "mild" or "severe" and to
sor and the liquid line dryer. Any carbon deposits
use the severity as a guide for the clean-up proce-
indicate a severe burnout.
dure to be followed. The severity can be deter-
(4) If none of the above indications of severe
mined by the following means:
contamination are found, then the burnout can be
(1) If possible, obtain a small sample of oil
classified as mild.
from the burned out compressor and analyze it,
e. Clean-up After a Mild Burnout. When the
using an acid test kit. Excessive acidity (over .05
burnout is mild, the contaminants can be removed
acid number) in the oil indicates a severe burn-
by changing the liquid line filter-dryer, or install-
out. This is the best method of determining the
ing one if the system did not have one originally.
severity of burnout. Discoloration of the oil may
The procedure to follow is:
also indicate a severe burnout.
5-18
|
|
Privacy Statement - Press Release - Copyright Information. - Contact Us |
