 |
|||
|
|
|||
|
Page Title:
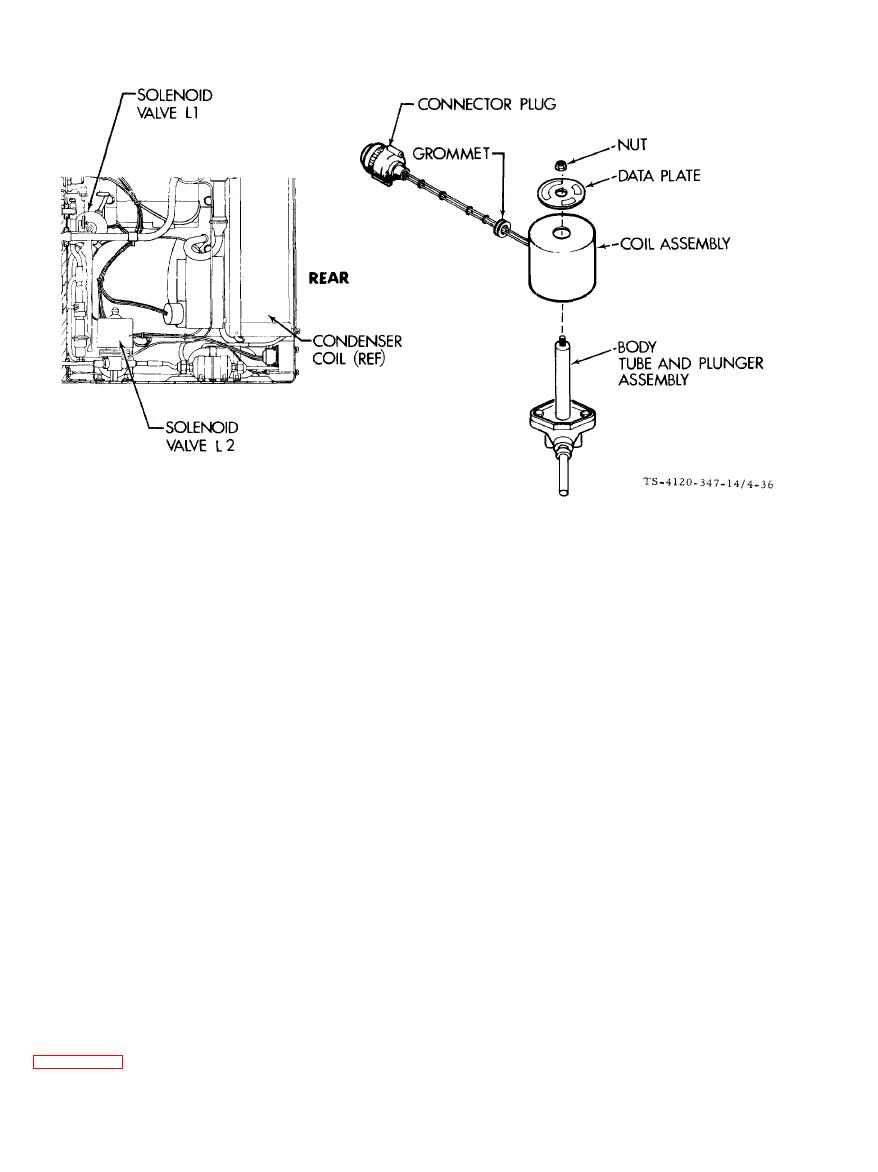
Figure 4-36. Solenoid Valve Coil Removal |
|
||
| ||||||||||
|
|
 TM5-4120-347-14
Solenoid Valve Coil Removal
(1) Disconnect power at power source.
(2) Remove the top rear cover.
NOTE
The following basic instructions apply to both the by-pass solenoid L1 and the pressure equalizer
solenoid L2.
b. Test
(1) Disconnect the solenoid valve connector plug. The plug number is P8 for the L1 solenoid and F9 for
the L2 solenoid valve.
(2) Use a continuity tester or a multimeter set on the lowest OHMS scale to check for continuity between
pins A and B in connector plugs. If continuity is not found, the coil is open and must be replaced.
(3) Use the continuity tester or multimeter to check for continuity between each pin in connector plug and
the coil casing. If continuity is found between either pin and the case, the coil is grounded and should be
replaced.
(4) If continuity checks are satisfactory, apply 24 volts dc from an external power supply across pins A
and B in connector plug and listen for a sharp click when the valve changes position. If a click is not heard,
internal valve problems are indicated and the entire valve should be replaced. Refer to direct support
maintenance.
c. Coil replacement. The coil can be replaced without opening the refrigeration pressure system. Refer to
4-76
|
|
Privacy Statement - Press Release - Copyright Information. - Contact Us |
