 |
|||
|
|
|||
|
Page Title:
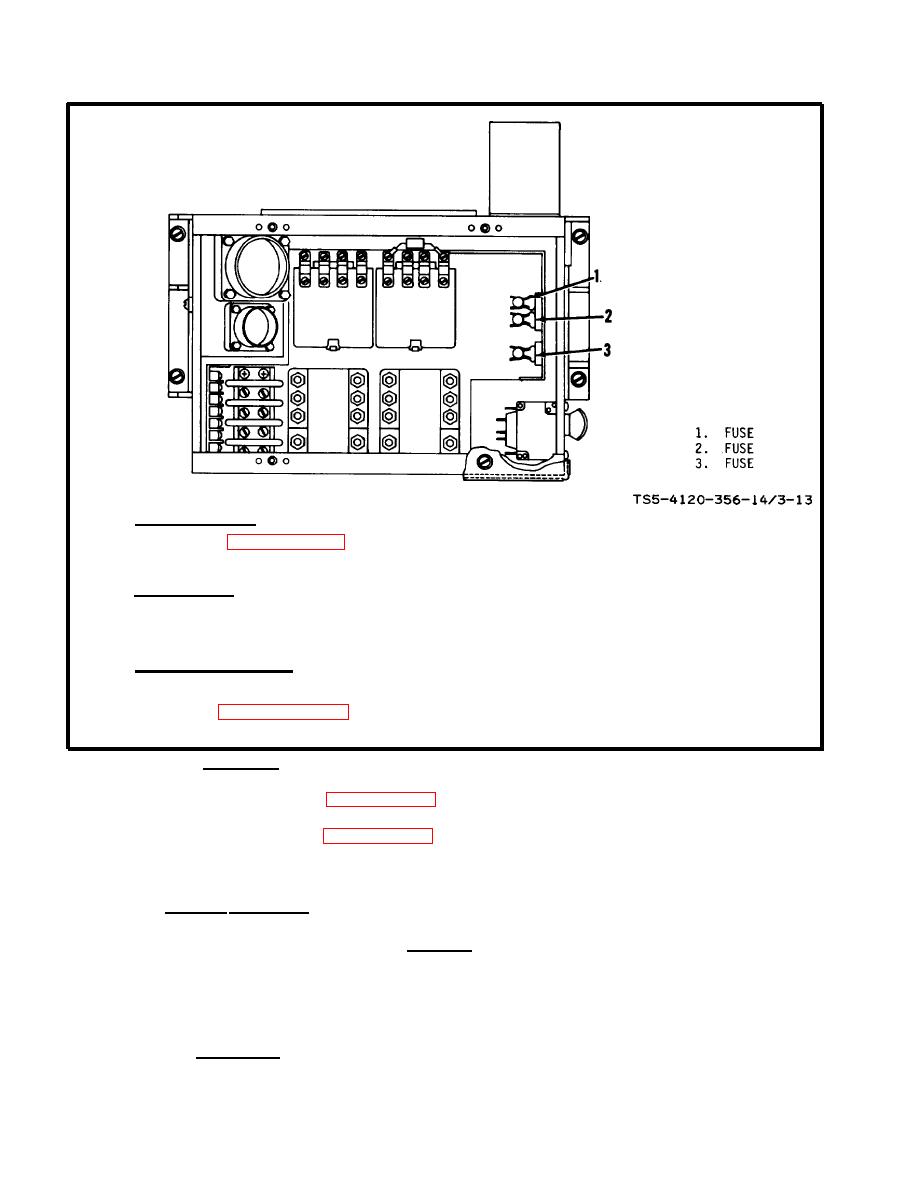
Figure 3-13. Removal, test and installation of fuses |
|
||
| ||||||||||
|
|
 TM 5-4120-356-14
REMOVAL OF FUSES
REFER TO PARAGRAPH 3-10f FOR PRELIMINARY STEPS IN THE REMOVAL OF FUSES.
1.
2. GRASP EACH FUSE WITH FUSE PULLER AND PULL FUSE FROM HOLDER. TAG EACH FUSE.
TEST OF FUSES
1. USING A CIRCUIT TESTER, CHECK FOR CONTINUITY BETWEEN THE TWO ENDS OF EACH FUSE.
2. REPLACE ANY FUSE WHICH DOES NOT SHOW CONTINUITY.
INSTALLATION OF FUSES
1.
USING FUSE PULLER, PRESS EACH FUSE INTO ITS PROPER HOLDER. REMOVE TAGS.
2. REFER TO PARAGRAPH 3-10f FOR FINAL STEPS IN INSTALLATION OF FUSES.
Figure 3-13. Removal, test and installation of fuses
(4) Installation.
(a) Refer to figure 3-13 and install fuses in junction box.
(b) Refer to figure 3-12 and install panel (13) on junction box.
(c) Reinstall lower access panel on air conditioner.
g.
WARNING
Disconnect the air conditioner from the
electrical power source before removing
circuit breaker from junction box.
(1) R e m o v a l .
|
|
Privacy Statement - Press Release - Copyright Information. - Contact Us |
