 |
|||
|
|
|||
|
|
|||
| ||||||||||
|
|
 TM 5-4120-359-14
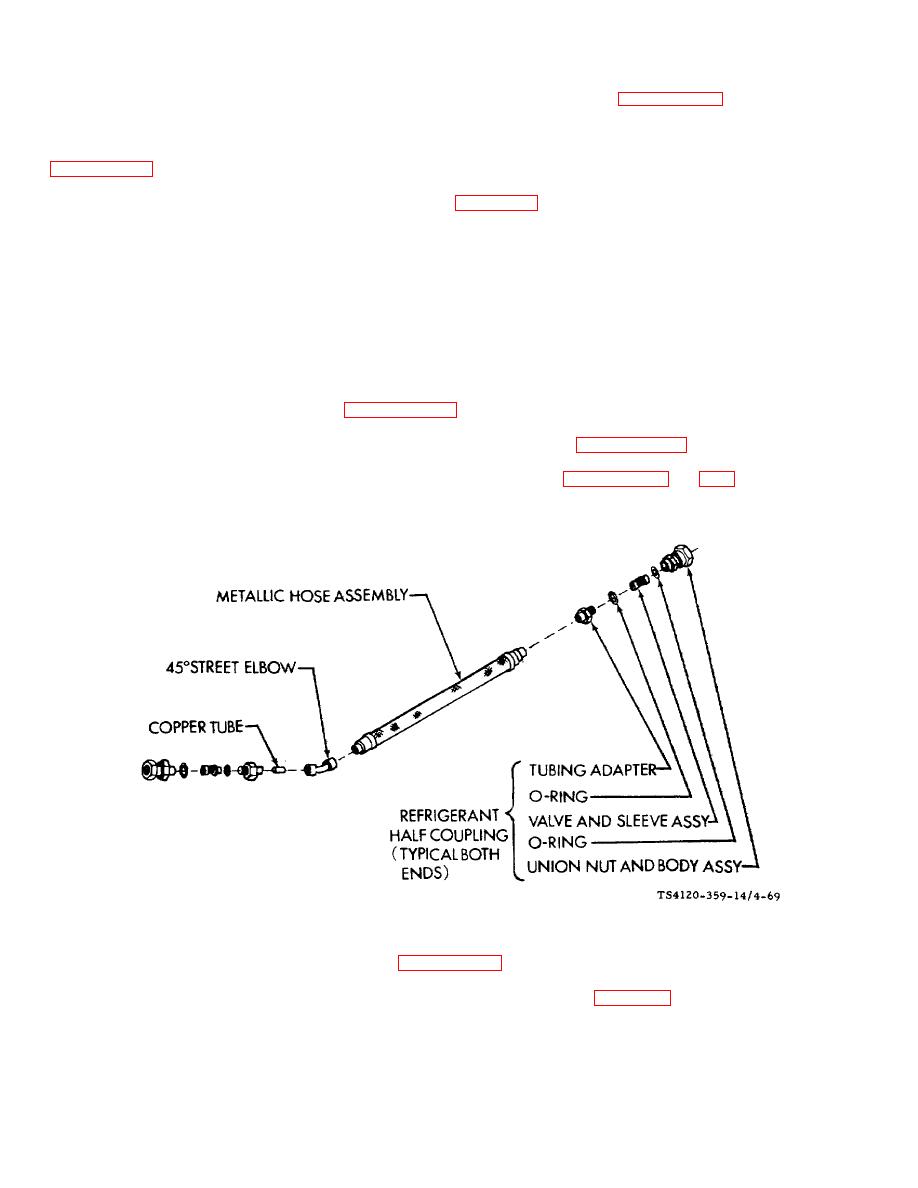
(6) If metallic hose, 45 street elbow, or tubing adapters are damaged, see paragraph 4-7 and debraze parts to
be replaced.
(7) If metallic hose, 45 street elbow, or tubing adapters are being replaced, clean all joints and braze parts per
(8) Oil O-rings liberally with refrigerant oil, item 13, Appendix E. This will prevent them from scuffing and tearing
when assembled.
(9) Place smaller O-ring on valve and sleeve assembly and larger O-ring on tubing adapter.
(10) Slip the valve and sleeve assembly with O-ring into the body.
(11) Using a wrench to hold the tubing adapter, tighten the union nut and body assembly and torque to 35-45 foot
pounds (48-61 newton meters).
(12) Install the hose in the air conditioner. See c.(1) through (4).
(13) Replace the dehydrator. (See paragraph 4-73.)
(14) Leak test the hose, dehydrator and joints in the repair area. (See paragraph 4-48.)
(15) Evacuate and charge the refrigerant system in accordance with paragraphs 4-9 and 4-10.
e. Disassembly/Reassembly discharge hose
Figure 4-69. Discharge Hose
(1) Discharge the refrigerant system. (See paragraph 4-5.)
(2) Remove the hose from the air conditioner. See b.(1) through (4) and figure 4-67.
4-141
|
|
Privacy Statement - Press Release - Copyright Information. - Contact Us |
|
|
Integrated Publishing, Inc. - A (SDVOSB) Service Disabled Veteran Owned Small Business
|

