 |
|||
|
|
|||
|
|
|||
| ||||||||||
|
|
 TM 5-4120-374-13
ACTION
LOCATION/lTEM
REMARKS
a. Inspect floating self-locking nuts for damage.
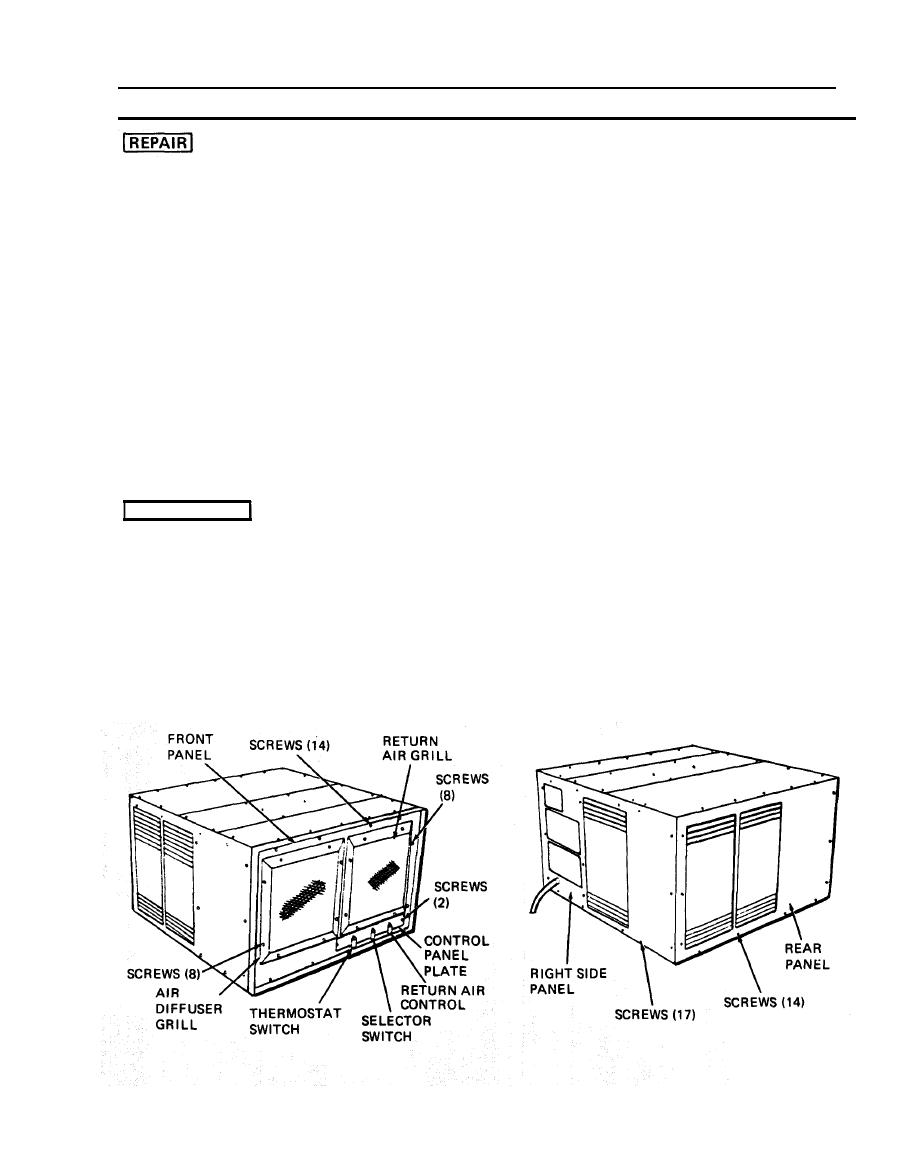
11. Front Panel
b. Drill out blind rivets, then rivet new nut to front panel.
Repair consists of straightening bent louvers.
12. Right Side,
Left Side and
Rear Panels
13. Top Front and
a. Inspect self-locking plate nuts for damage.
Rear Panels
b. Drill out blind rivets, then rivet new nut to top front panel.
c. Inspect panels for distortion or loose gasket.
d. Secure loose gasket with adhesive per specification MMM-A-121.
e. Replace gasket with .062 inch thick wool felt per specification
MlL-G-20241. Secure gasket with adhesive per specification
MMM-A-121.
a. Inspect panel for distortion.
14. Top Center Panel
b. Straighten or replace damaged panel.
Repair consists of straightening bent louvers.
15. Grills
INSTALLATION
FRONT OF HOUSING
a. Align holes in thermostat switch with holes in front panel.
16. Front Panel
b. Secure thermostat switch to front panel with two (2) screws.
c. Align holes in front panel with holes in housing.
d. Secure front panel with fourteen (14) screws.
17. Control Panel Plate a. Align holes in control panel plate with holes in front panel.
b. Secure control panel plate with two (2) screws.
c. Install three (3) knobs.
4-23
|
|
Privacy Statement - Press Release - Copyright Information. - Contact Us |
