|
| |
5-13.
TM5-4120-377-14
Preliminary procedure:
Remove junction box. (See para 4-46.)
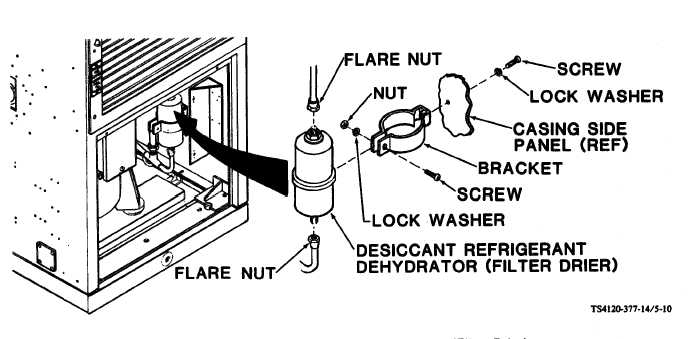
Figure 5-10. Desiccant Refrigerant Dehydrator (Filter Drier)
a.
5-9.
b.
NOTE
The dehydrator must be replaced each time the refrigeration system has been opened. It
should be installed just before unit is leak tested.
Inspect
(1) Check for general condition and signs of leakage. If leakage is suspected, leak test per paragraph
(2) Check that mounting bracket is secure.
Remove
(1) Discharge the refrigerant system per paragraph 5-6.
(2) Using wrench, loosen and disconnect flare nuts.
(3) Using screwdriver, remove bracket mounting screw and lock washer, from right side of air
conditioner.
(4)
(5)
(6)
Slip dehydrator and bracket from air conditioner.
Using screwdriver and wrench, remove screw, lock washer, and nut from bracket.
Remove dehydrator from bracket.
5-23
|