 |
|||
|
|
|||
|
|
|||
| ||||||||||
|
|
 DRAFT
TB 9-2320-364-13&P-1
LEFT SIDE NOISE PANEL AND RUBBER FLAP REPLACEMENT - Continued
- - - - - - - - - - - - - - - - - - - - - - - - - - - - - - - - - - - - -
PLSAC042
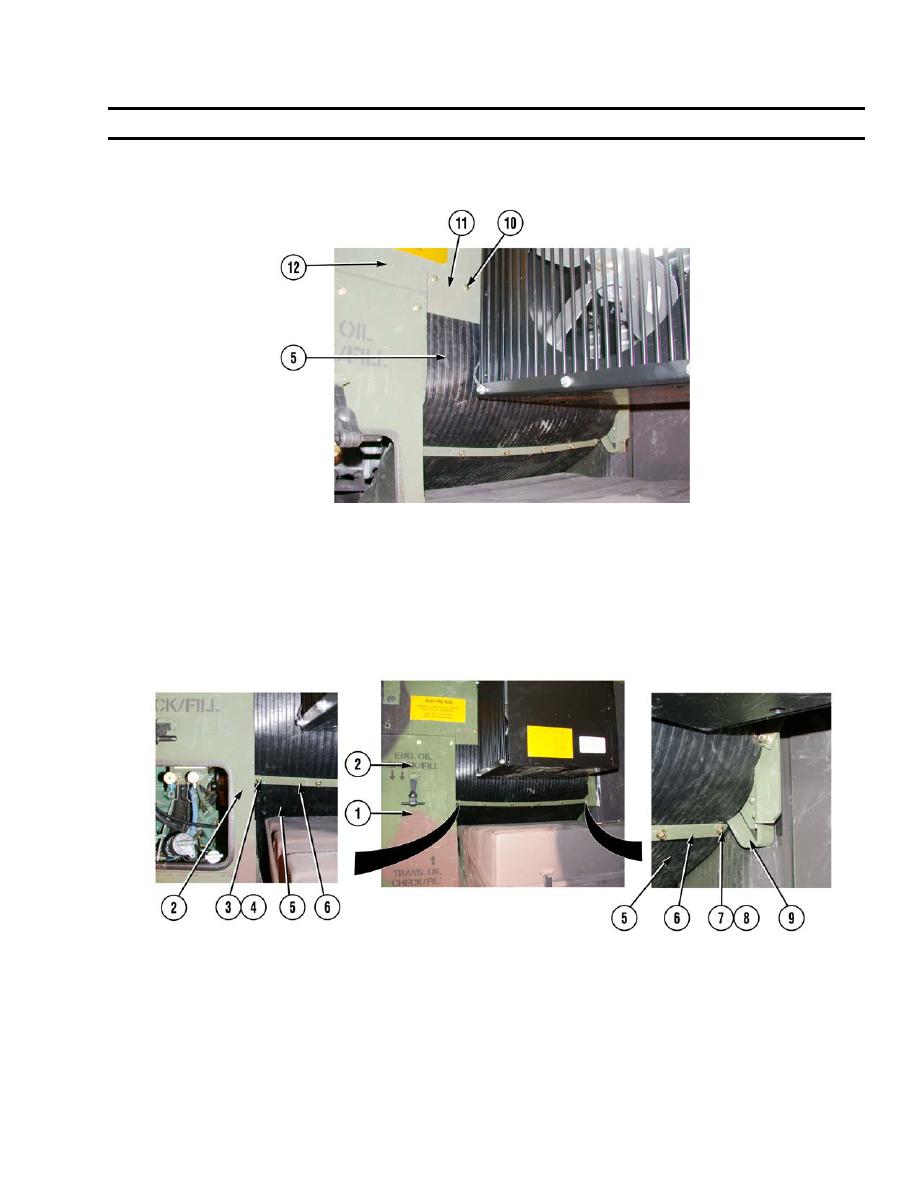
NOTE
Bottom of rubber flap needs to be positioned behind the battery box cover and in front of
the compressor mounting bracket.
Only use five screws to install rubber flap on panel. Two inside screws not needed.
3. Install rubber flap (5) on panel (12) with plate (11) and five screws (10).
PLSAC041
4. With the aid of an assistant, install restraint bar (6) and rubber flap (5) on stabilizer bracket (9) with
screw (8) and locknut (7).
5. Install restraint bar (6) and rubber flap (5) on left side noise panel (2) with screw (4) and locknut (3).
6. Close access door (1) on left side noise panel (2).
0051-5
|
|
Privacy Statement - Press Release - Copyright Information. - Contact Us |
