 |
|||
|
|
|||
|
|
|||
| ||||||||||
|
|
 TM5-4110-234-14
TO 40R7-5-7-1
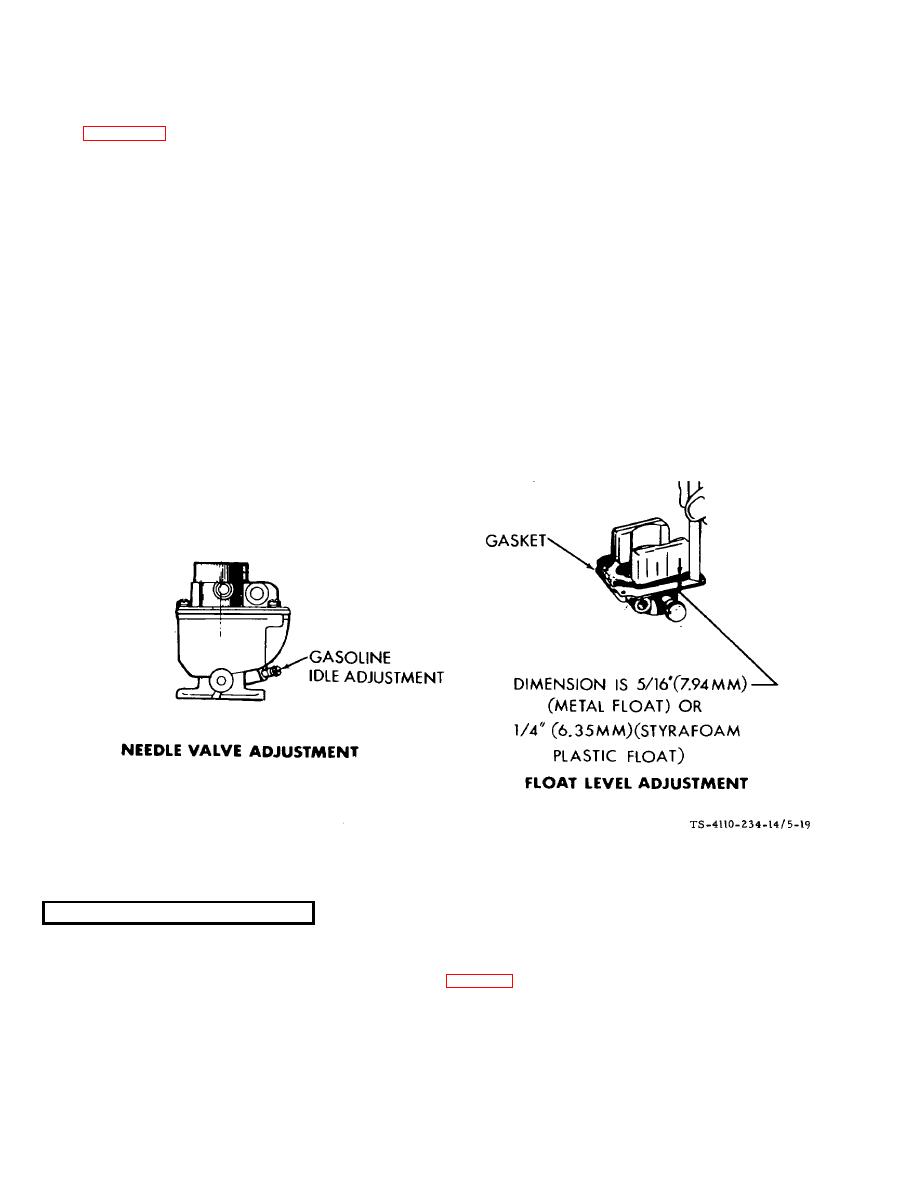
(3) To adjust the carburetor float level, bend the float tab near the shaft as needed to obtain the correct level.
(See figure 5-19.)
(4)
For further adjustment instructions see paragraph 464.
c.
Removal.
(1)
Remove the air cleaner by loosening the screw at its base.
(2)
Remove the manifold from the engine.
(3)
Remove two screws securing the carburetor to the manifold.
d.
Replacement.
(1)
Install the carburetor (with a new gasket) to the manifold.
(2)
Install the manifold (with new gaskets) on the engine.
(3)
Install the air cleaner onto the carburetor and tighten the screw at its base.
Figure 5-19. Carburetor Needle Valve and Float
Level Adjustment F10000RG-2
5-36.
STARTER (F10000RG-2)
a. For proper cranking motor operation with a minimum of trouble, a periodic maintenance procedure should be
followed. Periodic lubrication, inspection of the brushes and commutator as described in this section will ensure long
cranking motor life. Periodic disassembly of the cranking motor for a thorough overhaul is recommended as a safeguard
against accumulations of dust, grease and parts wear. See fig. 5-20.
b. Lubricate all oil-type bearings with 8 to 10 drops of light engine oil. All oil-less type bearings and brushings
should be given a few drops of light oil. Lubricate the cranking motor drives with a few drops of light engine oil.
5-41
|
|
Privacy Statement - Press Release - Copyright Information. - Contact Us |
