|
| |
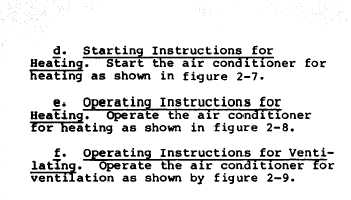
figure 2-7
figure 2-8
figure 2-9
2-12.
Preparation for Movement. To
prepare the air conditioner for move-
ment, proceed as follows.
2-13.
Dismantling for Movement.
a.
Disconnect main power Cable.
b.
Disconnect drain line from out-
let.
c.
Disconnect air ducts and install
the-evaporator inlet and outlet
grilles.
d.
face.
e.
over a
2-14.
Remove unit from mounting sur-
If air conditioner is to be moved
long distance, recrate it.
Reinstallation After Movement.
After movement, follow procedures in
paragraph 2-9 to reinstall the air
conditioner.
2-15.
Identification.
a.
Identification.
Each air condi-
tioner has one major identification
plate mounted on the side of the unit.
The plate specifies nomenclature, manu-
facturer, military part number, BTU/hr.,
phase, hertz, volts, serial number, con-
tract number, and shipping weight. A
manufacturer’s identification plate
mounted just below the military plate
contains the manufacturer's name and ad-
dress and the model and serial numbers.
b.
Information Plates.
The air con-
ditioner has the following information
plates pertinent to operation.
(1) Wiring Diagram Plate. It is
located on the top of the unit.
This
illustrates complete air conditioner
wiring.
TM 5-4120-361-14
(2) Fluid Diagram Plate. It is lo-
cated on the top of the unit.
The plate
illustrates complete air conditioner re-
frigerant system.
(3) Ventilation Instruction Plate.
It is located on the left front side of
the unit.
This plate indicates the di-
rection to turn vent adjusting knob to
open or close the damper door in the
ventilation air duct.
(4) Control Module Instruction
Plate.
It is located on the front of
the unit.
This plate indicates the fol-
lowing.
(a) The ON and OFF positions of
the control circuit breaker.
(b) The ON and OFF positions of
the compressor circuit breaker.
(c) The various heating and cool-
ing positions for the mode selector
switch.
(d) Temperature increase and de-
crease positions for the temperature se-
lector switch.
(e) The HIGH and LOW positions of
the evaporator fan speed switch.
(f) The manufacturer’s model num-
ber of the unit.
(g) The part number of the
plate.
(5) Main Power Plate. It is lo-
cated on the front of the unit above the
control module and contains the main
power receptacle.
(6) High Pressure and Low Pressure
Reset Plates.
They are located on the
left side of the unit below the service
valve access panel.
These plates indi-
cate location of the high and low pres-
sure reset buttons.
(7) Service Valves. The high pres-
sure and low pressure service valve
plates are located on the left side of
the unit above the service valve access
panel.
These plates indicate the loca-
tion of the service valves.
(8) Danger Warning Plate. It is
located on the right side of the air
conditioner near the front.
This plate
warns of the hazard in operating the air
conditioner without a grounding wire.
2-15
|