|
| |
TM5-4120-376-14
5-20. DEHYDRATOR (FILTER-DRIER) AND RELATED TUBING/Replace (Cont)
LOCATION/ITEM
Removal:
3. Discharge the system in accordance with paragraph 5-8, page 5-10.
4. Remove four screws (7) four lock washers (8) two clamps (9) and four spacer posts (10)
securing dehydrator (11) and dehydrator mounting bracket (12) to bulkhead.
5. Unscrew the tubing flare nuts (13) from both ends of the dehydrator (11) and remove from
unit.
Installation:
1. Connect the tubing flare nuts (13) to both ends of the dehydrator (11).
2. Align dehydrator (11) dehydrator mounting bracket (12) four spacer posts (10) and two
clamps (9) with holes in bulkhead and secure with four screws (7) and four lock washers (8).
3. Test, evacuate and charge
system in accordance with
paragraphs 5-8 through 5-14,
pages 5-10 through 5-19.
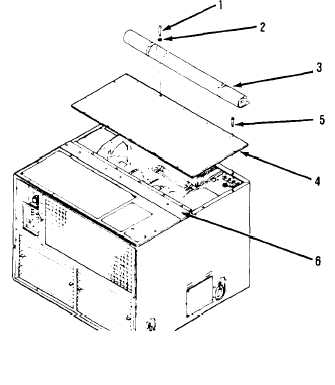
4. Align rear cover (4) with
holes in center cover (6) and
housing and secure with fourteen
screws (5).
5-48
|