|
| |
TM5-4120-377-14
b. Inspection
(1) Check fan for dents, bent or loose fan blades, and that hub is securely attached. Replace if damaged.
(2) Check inlet bell for dents or any distortion that would cause interference with fans. Replace if
damaged.
c.
d.
e.
(3) If a motor problem is suspected, inspector test motor in accordance with paragraph 4-63.
Clean
(1) Use a clean dry cloth and a soft brush to remove dirt from fan.
(2) If fan and inlet bell are excessively dirty, wash them with a mild detergent and water solution.
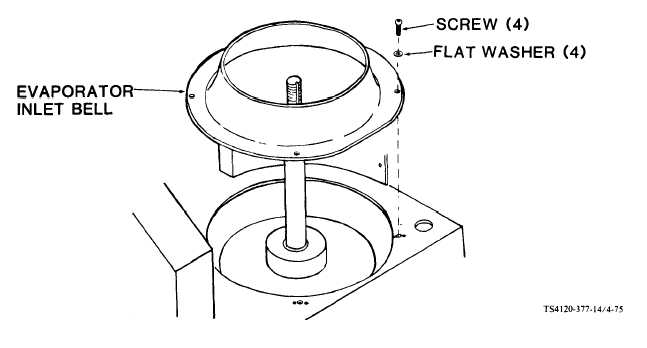
Evaporator fan inlet bell removal
Take care that hardware does not drop down into unit.
(1) Using screwdriver, remove four screws and lock washers.
Figure 4-75. Evaporator Inlet Bell
(2) Lift inlet bell up and out of unit.
Evaporator inlet bell installation
(1) Place inlet bell in unit and aline mounting holes.
NOTE
Flat edge on inlet bell should be toward evaporator coil.
4-116
|