 |
|||
|
|
|||
|
|
|||
| ||||||||||
|
|
 TM 5-4120-393-14
4-61. Solenoid Valve (K3 and K4) Coil Removal (cont)
WARNING
Do not attempt any disassembly of the solenoid valve, other than coil removal,
with a refrigerant charge in the system.
Refrigerant will be sprayed out
dangerously if the screws that attach the tube and plunger assembly to the valve
body are loosened.
1.
Remove wiring harness connector from connector or solenoid valve.
2.
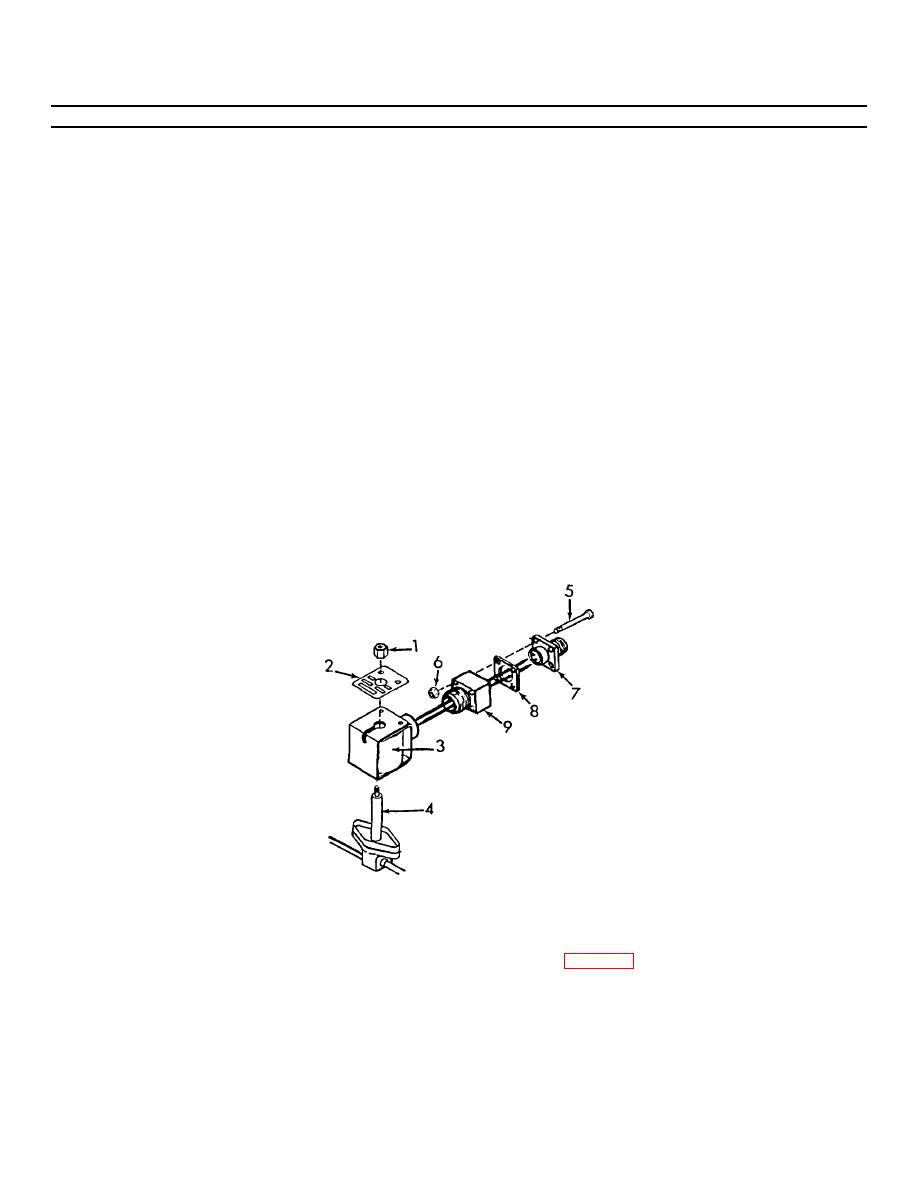
Remove nut (1) that attaches nameplate (2) and coil (3) to valve body (4), and remove coil and connector assembly.
3.
Remove four screws (5) and nuts (6) that attach connector (7) to adapter (9) on coil.
4.
Pull connector (7) away from adapter (9), unsolder coil leads from pins in connector (7) and remove connector (7) and
gasket (8).
5.
Remove adapter (9) from coil casing (3).
6.
Feed leads of new coil through adapter (9), and then install adapter on coil casing (3).
7.
Feed coil leads through gasket (8), solder them to pins in connector (7), then install gasket (8), connector (7), and four
attaching screws (5) and nuts (6) on adapter (9).
8.
Install coil and connector assembly, nameplate (2) and attaching nut (1) on valve body (4).
NOTE
FOLLOW ON MAINTENANCE:
1.
Install junction box number two. See para 4-46.
2.
Connect power.
4-141
|
|
Privacy Statement - Press Release - Copyright Information. - Contact Us |
|
|
Integrated Publishing, Inc. - A (SDVOSB) Service Disabled Veteran Owned Small Business
|

