 |
|||
|
|
|||
|
|
|||
| ||||||||||
|
|
 TM9-4120-423-14&P
REMOVAL
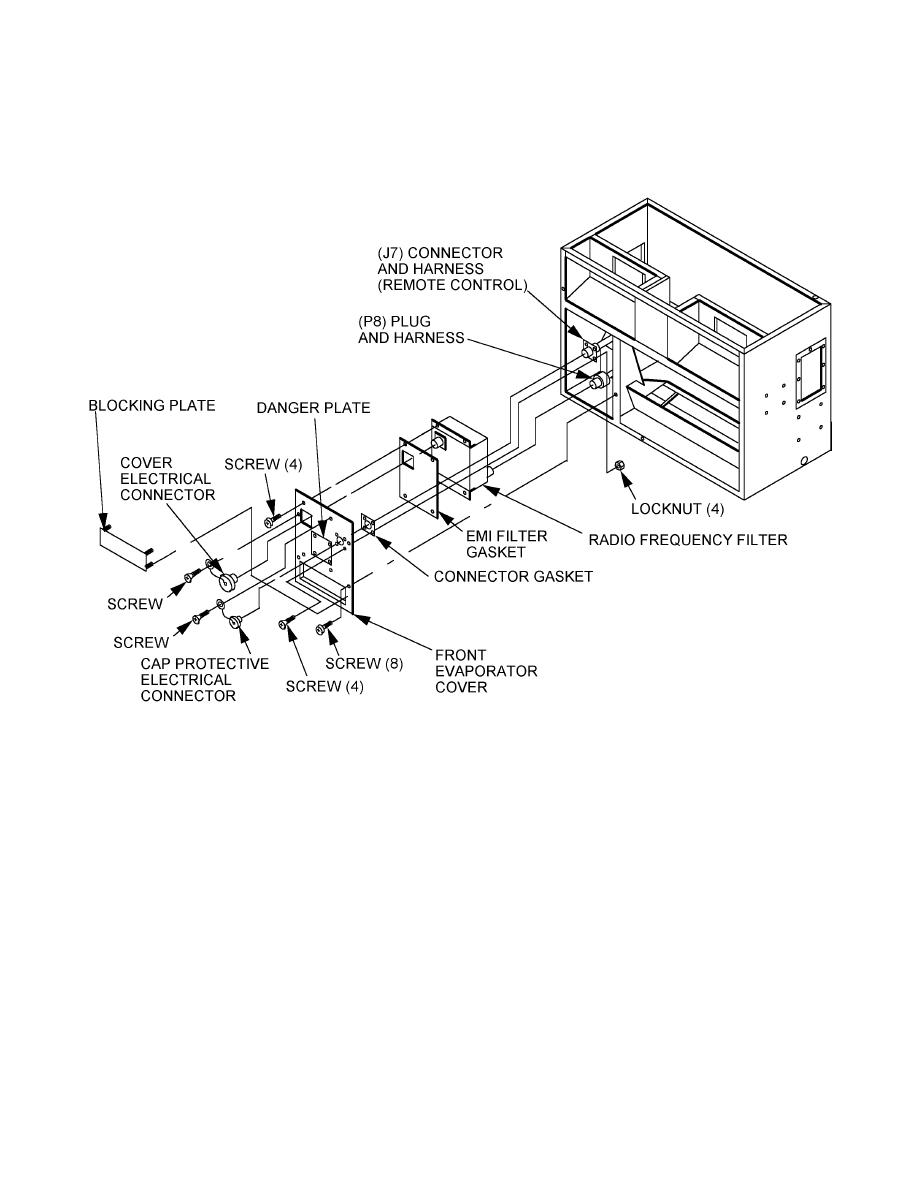
Radio Frequency Filter (FL1)
1
Using screwdriver, remove eight screws from the outside edges of the front evaporator cover,
while supporting (holding) cover.
2
Carefully slip front cover out and down so that the radio frequency filter can be supported (held)
while it is removed.
3
Using screwdriver, remove four screws from the radio frequency filter. The protective cap and
cover for the electrical connectors will come off when the two top screws are removed. Take
care that they are not lost.
4
Sit the filter down on the inside of the evaporator housing. Take care that the EMI filter gasket is
not damaged or lost.
5
Using a screwdriver, socket and ratchet, remove the four screws and locknuts from the remote
control harness connector (J7).
0023 00-2
|
|
Privacy Statement - Press Release - Copyright Information. - Contact Us |
