 |
|||
|
|
|||
|
|
|||
| ||||||||||
|
|
 TM 9-4120-428-14
0090 00
6
6
4
4
7
7
5
5
BOTTOM
BOTTOM
OF HOUSING
OF HOUSING
5
5
4
4
3
3
2
2
1
1
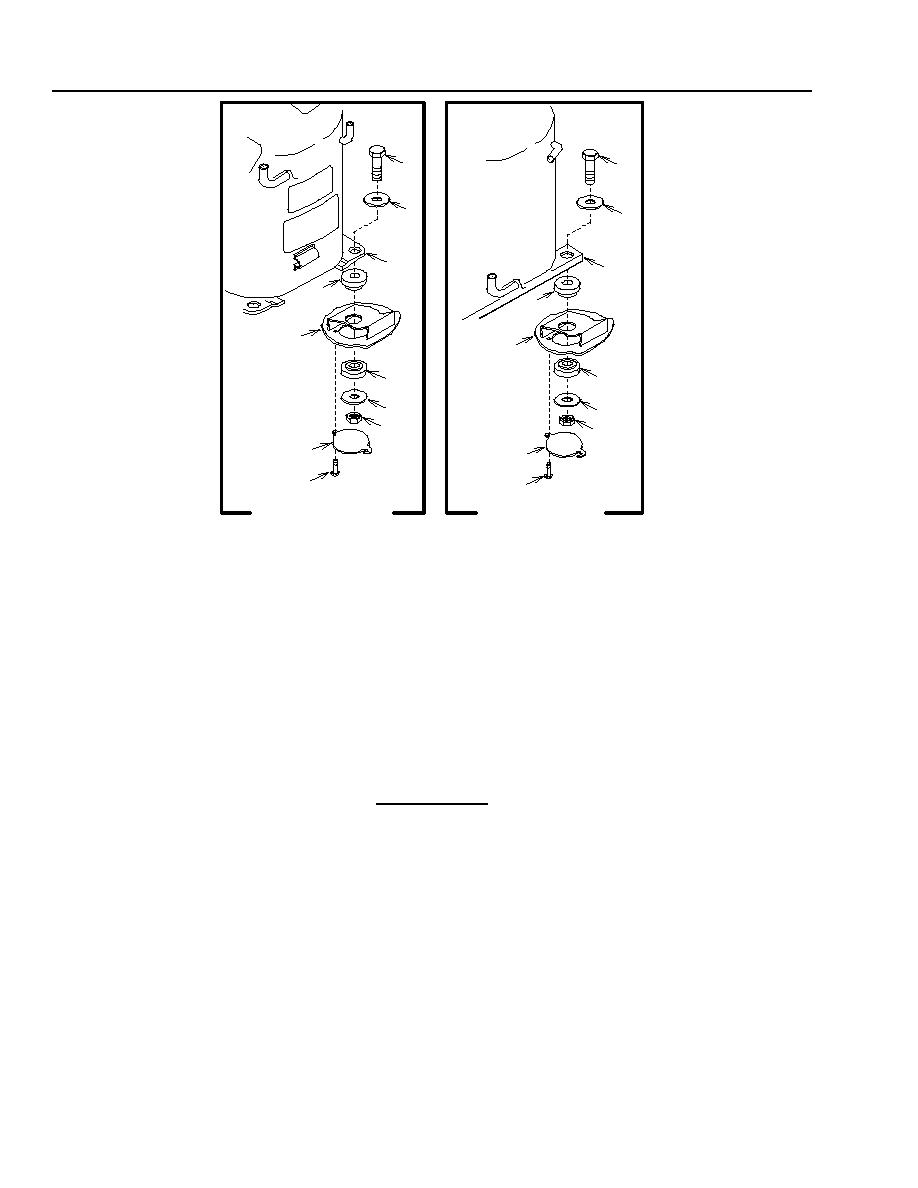
KECO INDUSTRIES 3
WELCO INDUSTRIES
PHASE COMPRESSOR
COMPRESSORS
8. Check compressor to determine if motor burnout is indicated:
a)
Tip the compressor toward the discharge port and drain a small quantity of oil into a clear gas container.
b) If the oil is clean and clear and does not have a burnt-acid odor, the compressor DID NOT fail due to motor
burnout. Install a new compressor.
c) If the oil is black, contains sludge, and does have a burnt-acid odor, the compressor HAS failed due to
motor burnout. Flush the refrigerant system prior to installing the new compressor.
INSTALLATION
CAUTION
The compressor is supplied with a complete charge of oil. Be sure that the oil is not lost
when handling and installing the compressor.
1. If any refrigeration piping was disconnected and removed with the compressor, transfer the piping to the
replacement compressor.
2. Place four shims (5) into the unit on the mounting channels.
3. Carefully set the compressor (7) down onto the shims (5).
4. Install four flat washers (4) and screws (6).
5. Lift and support the air conditioner to gain access to the bottom of the housing.
6. Install four shims (5), flat washers (4), and self-locking nuts (3).
7. Swing four access panels (2) into place and tighten the screws (1).
8. Braze the tube connections.
9. Connect the P10 connector.
0090 00-4
|
|
Privacy Statement - Press Release - Copyright Information. - Contact Us |
