 |
|||
|
|
|||
|
|
|||
| ||||||||||
|
|
 TM5-4110-234-14
TO 40R7-5-7-1
(5) Apply sufficient heat uniformly around the joint to quickly raise it to a temperature that will melt the filler
alloy. Remove heat as soon as brazing is completed.
5-13.
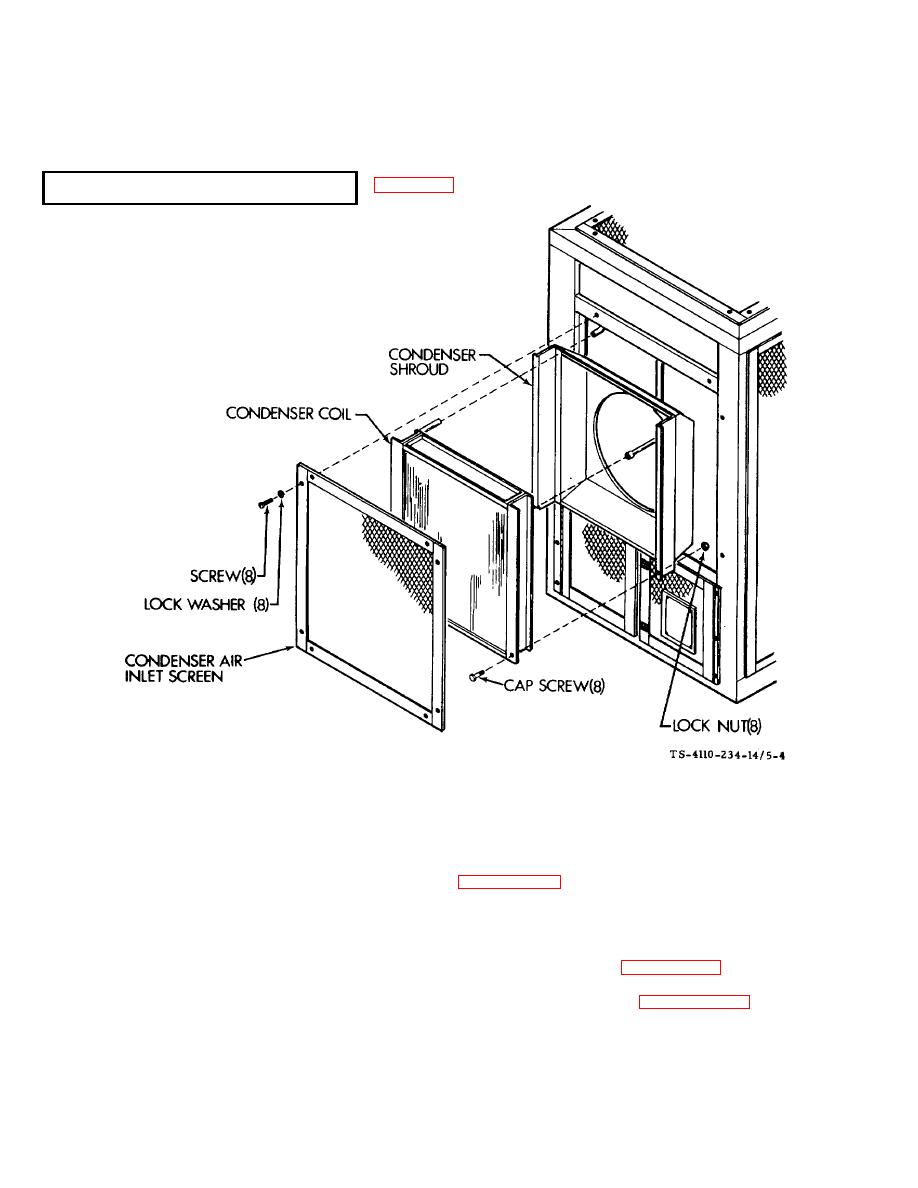
Figure 5-4. Condenser Coil and Shroud
a.
Removal.
(1)
Pump the system down in accordance with paragraph 5-6.
(2)
Remove 8 screws and lock washers and remove the condenser air inlet screen.
(3)
Connect a dry nitrogen source to the compressor discharge service tee and loosen the flare nut to the
receiver inlet valve. Purge this section of tubing in accordance with paragraph 5-9.
(4)
Debraze the condenser inlet and outlet tubing, using the techniques of paragraph 5-12.
(5)
Remove the mounting screws that hold the condenser and shroud to the refrigerator frame.
5-12
|
|
Privacy Statement - Press Release - Copyright Information. - Contact Us |
