|
| |
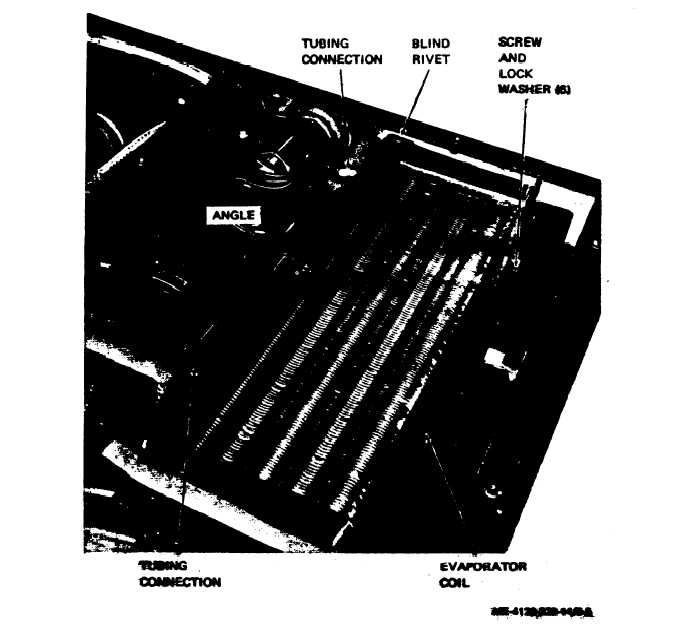
5-18. Evaporator Coil
(3) Refer to paragraph 4-18 and remove
a. Removal. Remove the evaporator coil as
evaporator air outlet louvers.
follows :
(4) Refer to figure 5-3 and disconnect tubing
(1) Refer to paragraph 6-3 and discharge the
from evaporator coil.
refrigerant system.
(5) Remove six screws and lock washers and
(2) Refer to paragraph 4-21 a n d r e m o v e
lift evaporator coil and angle from air conditioner.
housing top covers.
Angle is connected to coil with four blind rivets.
Figure .5-3. Evaporator coil, removal and installation.
b. Installation. Install evaporator coil as follows:
(4) Refer
to
paragraph
4-18
and inst
(1) If angle (fig. 5-3) was removed from coil,
evaporator air outlet louver.
secure angle to coil with four rivets.
(5) Refer to paragraph
4-21
and inst
(2) Install coil in air conditioner and secure
housing top covers.
coil to brackets with six screws and lock washers.
(6) Refer to paragraph 6-3 and charge t
(3) Connect tubing to coil.
refrigerant system.
all
all
h e
5 - 7
|