 |
|||
|
|
|||
|
Page Title:
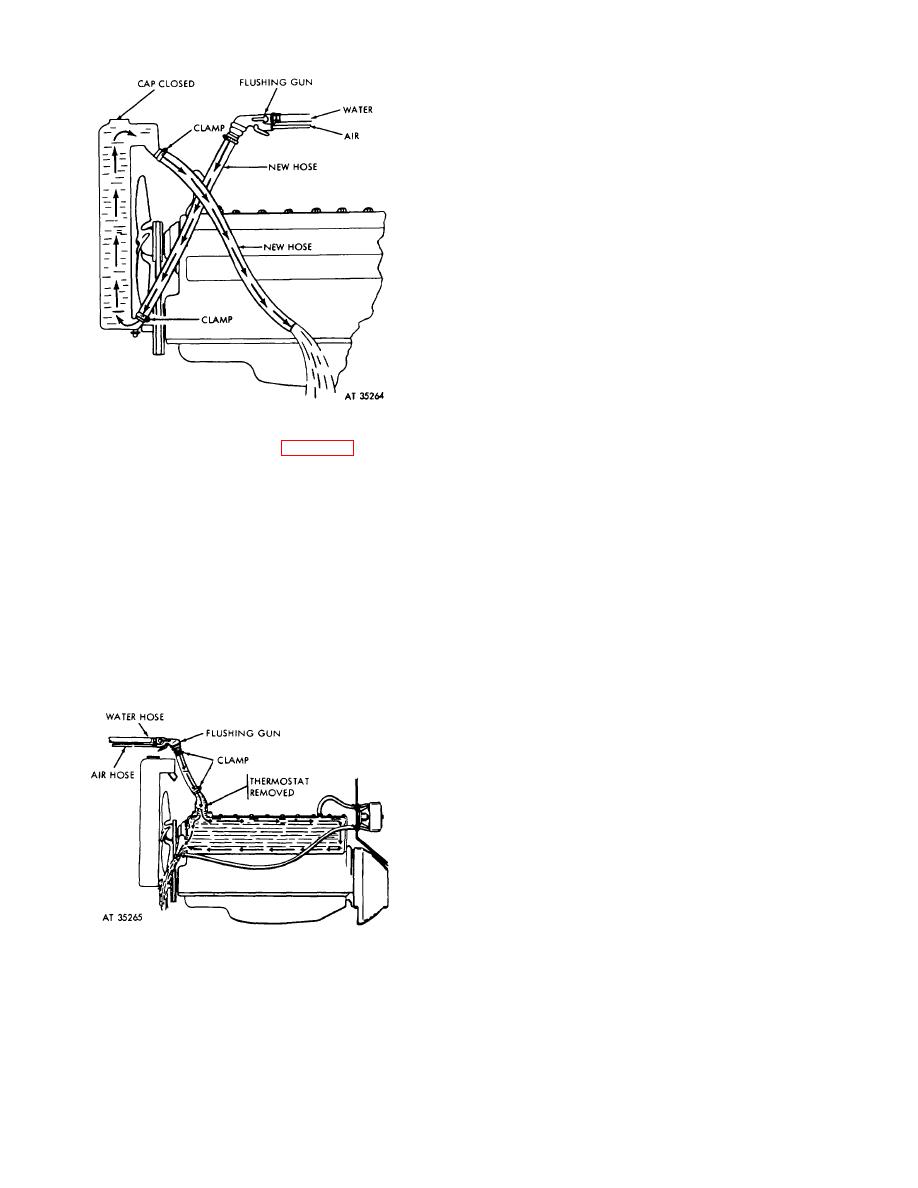
Figure 2-20. Pressure flushing of radiator. |
|
||
| ||||||||||
|
|
 replaced and direct support notified for corrective cleaning.
(5) When vehicle is equipped with a heater or other
accessories such as overflow tank connected to the
cooling system, flush heater, following the same procedure
used for the radiator core.
(6) After completing flushing operation and before
connecting cooling system hose, clean all hose
connections of both radiator and engine block. Clean
radiator overflow pipe, inspect, and, if necessary, lubricate
water pump, clean thermostat, and radiator cap control
valves. Check thermostat for proper operation before
installation.
h. Leaks. Close the drain cocks. Pour water slowly
into radiator until the system is approximately half full.
Start engine, run at idling speed, and fill the system
completely. Stop engine and examine the entire cooling
system for leaks. Carefully check the radiator hose
connections, water pump mounting bolts, seal and gasket,
Figure 2-20. Pressure flushing of radiator.
thermostat mounting bolts and gasket, and cylinder-head
bolts and gasket. Inspect radiator core for leakage. This
(2) To flush engine block (fig. 2-21), proceed as
is important because the cleaning solution may uncover
follows:
leaks which existed but were plugged with rust or
(a) Remove thermostat and replace thermostat
corrosion.
Reconnect overflow tank if it has been
housing.
disconnected and inspect caps and gaskets to be sure that
(b) Clamp flushing gun nozzle firmly to hose
they are in good condition and fit securely.
attached securely to engine water outlet opening.
(c) Fill engine with water, partly covering lower
i.
Coolant Service.
engine water inlet opening to facilitate complete filling.
(1) When servicing the engine for operation at
(d) Turn on compressed air to blow out water and
anticipated temperatures above 32F, nearly fill the system
loose sediment. Repeat filling with water and blowing out
with clean water Add COMPOUND, inhibitor, corrosion
with compressed air until flushing stream comes out clean
(FSN 6850-753-4967), in the proportion of one container
and then proceed as in f. above.
of inhibitor to each 4 gallons of cooling system capacity
including accessories. Then complete filling the system
(3) For most complete removal of sediment, repeat
with water. The capacity of the cooling system can be
flushing of radiator core and engine block in opposite
obtained from applicable technical manual.
direction.
(2) When servicing the engine for operation at
anticipated temperatures below 32F, use the procedure
prescribed for reclaimed or new antifreeze compound,
whichever is to be used. Inspect entire cooling system for
leaks and replace any hoses not suited for extended use.
2-22.
Special Instructions
a. One of the most common reasons for engine
damage due to overheating is operation with coolant level
low. Check coolant level daily before operation and add
coolant as required to bring level to top of filler neck If, at
any time, coolant loss exceeds 2 quarts, the system
should be thoroughly inspected for leaks (If no leakage is
found, radiator cap, or pressure relief valve if so equipped,
may be defec-
Figure 2-21. Pressure flushing of engine block.
(4) For badly clogged engine water jackets that do
not respond to regular pressure flushing, engine should be
2-17
|
|
Privacy Statement - Press Release - Copyright Information. - Contact Us |
