 |
|||
|
|
|||
|
Page Title:
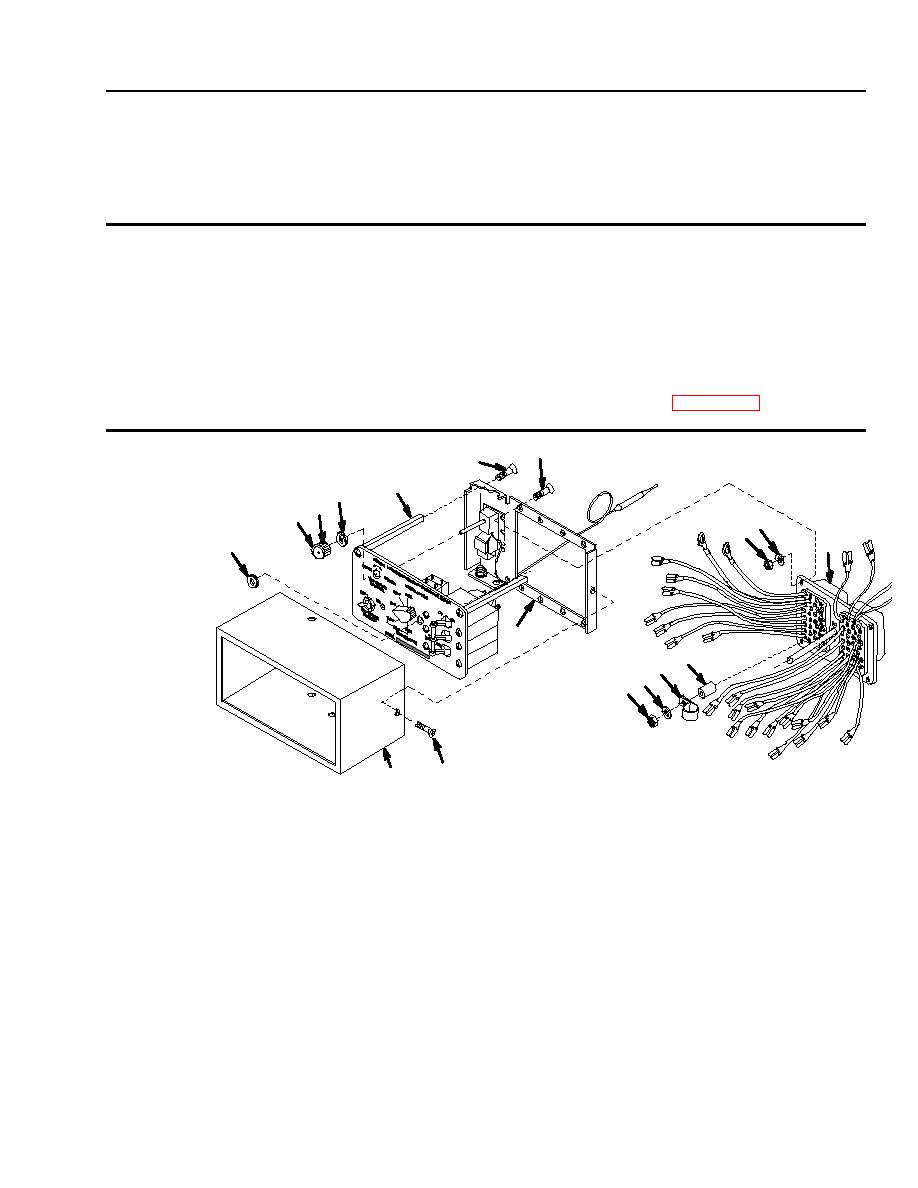
CONTROL MODULE WIRING HARNESS INSPECTION, REMOVAL, TESTING, REPAIR, REPLACEMENT, AND INSTALLATION |
|
||
| ||||||||||
|
|
 TM 9-4120-428-14
UNIT MAINTENANCE
AIR CONDITIONER, HORIZONTAL, COMPACT
(NSN 4120-01-502-1319)
CONTROL MODULE WIRING HARNESS INSPECTION, REMOVAL, TESTING, REPAIR, REPLACEMENT,
AND INSTALLATION
INITIAL SETUP:
Tools
Materials/Parts
Refrigeration Unit Service Tool Kit, WP 0000 00, Item
Control Module Wiring Harness
1
Self-Locking screws (3)
Self-Locking nuts (8)
Equipment Condition
Remove control module (WP 0029 00)
8
5
6
14
3
4
10
9
13
14
7
12
11
10
9
1
2
INSPECTION
11. Remove four machine screws (1) and pull off the control cover (2).
12. Inspect the connector receptacle (13) for loose, damaged, or missing pins. Replace if defective.
13. Check individual wires for loose solder connections, loose terminal lugs, cut or frayed insulation, and cut or broken
wires.
REMOVAL
14. Loosen the setscrew (3) in the (4). Remove knob.
15. Remove three self-locking screws (5) from the spacer posts (6) and remove the back mounting plate (7).
16. Tag and disconnect the wires from components and the ground stud.
17. Remove seven machine screws (8), self-locking nuts (9), and flat washers (10).
18. Remove screw (8), self-locking nut (9), flat washer (10), loop clamp (11), and electrical post (12). Pull the connector
receptacle (13) from the back mounting plate (7).
0035 00-1
|
|
Privacy Statement - Press Release - Copyright Information. - Contact Us |
