
TM 10-8145-222-23
0089
REPAIR CONTINUED
CAUTION
Seal may not easily press into slot in the door. If this occurs, a hammer or similar
blunt tool can be used to apply additional pressing force. Do not use sharp objects to
strike or aid in pushing the seal into the slot on the door. Using a sharp object will
result in damage to the seal and failure of the seal to seal the door when closed.
8. Press new outer seal (Figure 1, Item 3) in slot on door (Figure 1, Item 1).
9. Wipe excess lubricant off door (Figure 1, Item 1) and seals (Figure 1, Item 3 and Item 4).
10. Close applicable doors (Figure 1, Item 1).
Replace Emergency Escape Hatch Gaskets
NOTE
This procedure is applicable to either emergency escape hatch located in the side
door or in the rear door.
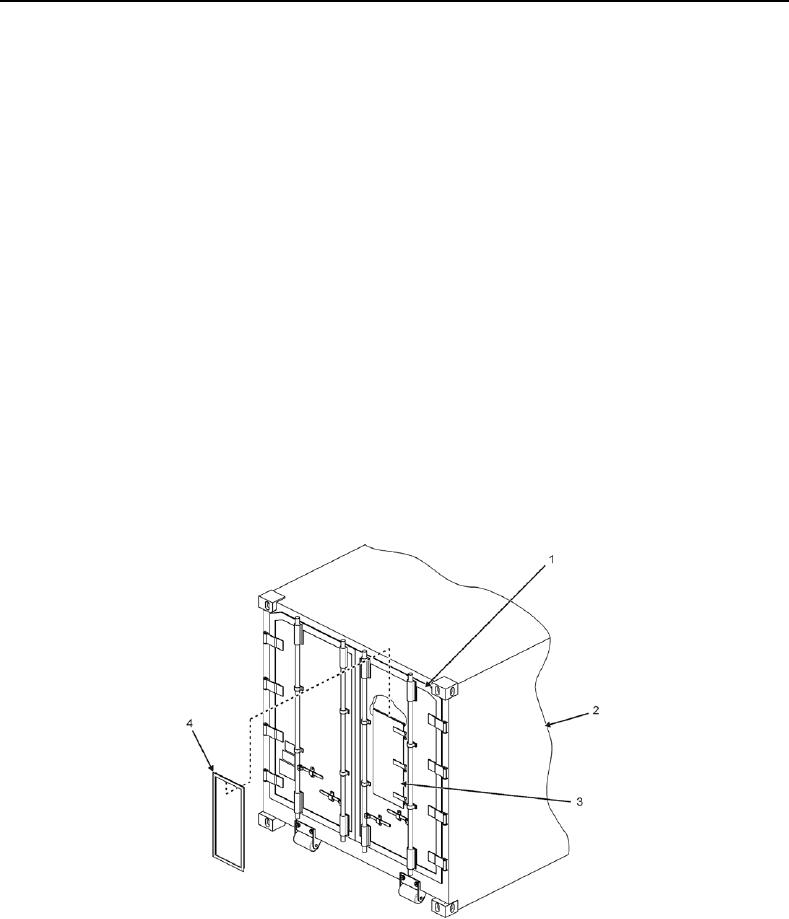
1. Open applicable container doors (Figure 3, Item 1) on container (Figure 3, Item 2) and secure open with chain.
2. Open applicable emergency escape hatch (Figure 3, Item 3) on container door (Figure 3, Item 1).
3. Apply lubricant between outer gasket (Figure 3, Item 4) and emergency escape hatch (Figure 3, Item 3).
Figure 3. Emergency Escape Hatch Outer Seal.