
TM 10-8145-222-23
0043
REPLACE CONTINUED
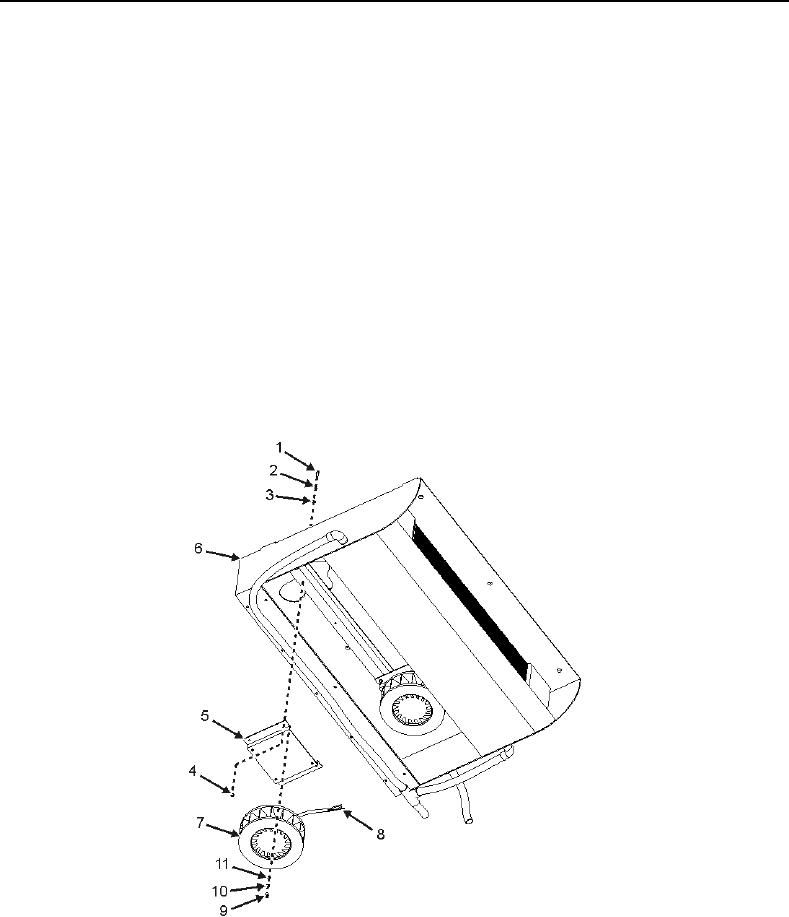
10. Remove four screws (Figure 3, Item 1), lock washers (Figure 3, Item 2), washers (Figure 3, Item 3), and nuts
(Figure 3, Item 4) securing blower motor mount bracket (Figure 3, Item 5) to evaporator (Figure 3, Item 6).
Discard lock washers.
CAUTION
The blower motor has wires attached to the rear of the assembly. These wires will
have to be disconnected prior to removal of the blower motor. Use care when pulling
the evaporator motor blower assembly mounting bracket away from the evaporator
so as not to damage the wiring.
11. Carefully pull mount bracket (Figure 3, Item 5), with blower motor (Figure 3, Item 7) attached, away from
evaporator (Figure 3, Item 6) enough to access rear.
12. Tag and disconnect wiring (Figure 3, Item 8) from blower motor (Figure 3, Item 7).
13. Remove four screws (Figure 3, Item 9), washers (Figure 3, Item 10), and lock washers (Figure 3, Item 11)
securing blower motor (Figure 3, Item 7) to blower motor mount bracket (Figure 3, Item 5). Discard lock
washers.
14. Remove blower motor (Figure 3, Item 7).
Figure 3. Evaporator Blower Motor Removal.